How to add a Remote Control for a New Application

This tutorial will show you how to add a Vectir remote control profile for controlling a new application.

Step 1: Add Remote Profile

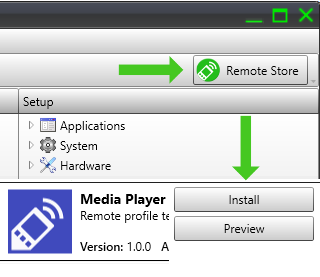
To start with we are going to add a Vectir remote profile. To make life easier you may wish to install a Vectir remote profile template from the remote store. Click the Remote Store icon and choose between the "HTPC Template" and "Media Player Template". Use the preview button to decide with design best suits your application. You can customize the design at a later stage if you wish.

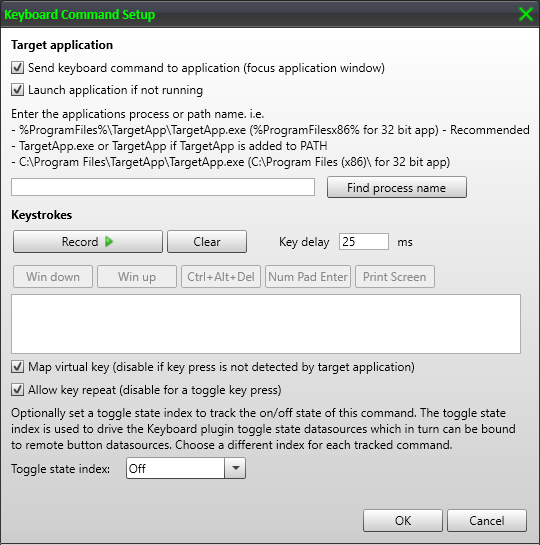
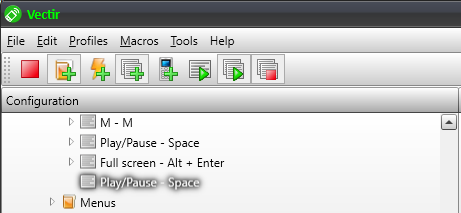
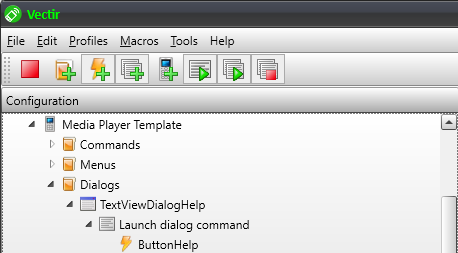
The remote profile templates include some keyboard commands which are already mapped (keyboard arrows, enter, space and esc for example). There are also some buttons in the remote design templates which are not mapped ready for your custom commands. The Media Player Template also includes a master volume slider already bound to the master volume datasink and source. The mute button is also mapped to the master volume mute command.

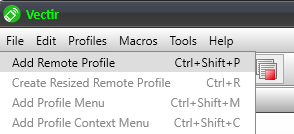
If none of the templates are suitable for your application, you can start from scratch by selecting 'Profiles' > 'Add Remote Profile'.

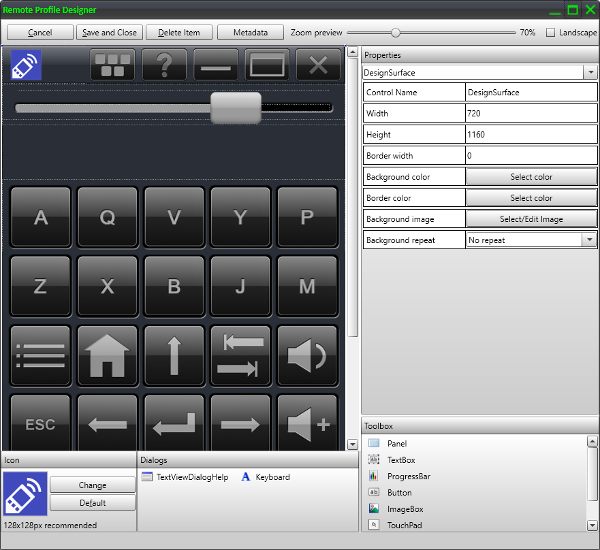
This will open the Remote Profile Designer. Add controls from the toolbox and create your own button graphics if you like.

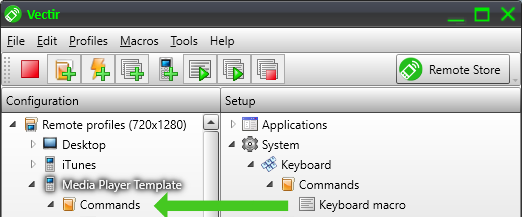
Here is an example of the Media Player Template downloadable from the Vectir remote store:

You can preview and edit this remote by right clicking on 'Media Player Template' in your remote profile folder in the Configuration panel and selecting 'Edit'.

Step 2: Add Remote Commands

The next step is to add remote commands to your remote profile. If you wish to control an application for which a Vectir plugin does not exist, you will probably want to control it with keyboard shortcut commands. Complile a list of keyboard commands that you would like to control from your remote. Then start adding keyboard commands to the Command folder of your remote from Setup > System > Keyboard > Commands > Keyboard macro. Drag the "Keyboard macro" command into the Commands folder of your remote profile as shown below:

The Keyboard Command Setup dialog will now open. It is recommended that you tick the 'Send keyboard command to application' checkbox. This way if your target application loses focus Vectir will make sure it still receives your keyboard commands. Then enter the path to your applications .exe file. If your application is running, you can use the 'Find process name' option.

Click the Record button, enter your keystroke(s) then click the 'Stop recording' button. The 'Map virtual key' checkbox only applies to Windows 7 or earlier. Untick this checkbox if you are on Windows 7 or earlier and your keypress is not detected by the target application. Untick the 'Allow key repeat' checkbox if you want to ensure your command does not run multiple times while the remote button is held.

A new command called 'Keyboard Keyboard macro' will have been added to the Commands folder of your remote profile.

Select this command then press F2 to open the rename dialog (or right click and select Rename). Give the command an appropriate name. You can enter whatever you like but the basic Vectir convection is "Command name - key name". i.e. "Play/Pause - Space".

Click the Rename button and your command will now show its new name.

Repeat Step 2 for all required commands.

Step 3: Map Commands to Button Events

Now we are going to map your commands to the corresponding remote profile buttons. If you have installed one of the remote templates, some of the commands will already be mapped.

Start by right clicking on your command and selecting 'Add Touchscreen Event'.

This will open the 'Add Touchscreen Event' dialog.

Select the button that you would like to control your command then press the OK button. This will map the button to the command and a new button event (lightening bolt icon) will appear under the command in the Configuration view.

Repeat step 3 for all unmapped commands. You can also map your command to device events by selecting 'Add device event' when you right click on your command. Examples of device events are volume up/down button presses, phone call incoming and phone call ended. The device events may not be available on all phones or tablets.

Step 4: Test your Remote Profile!

You can now load your remote profile on your phone or tablet and test your commands! Simply connect to the Vectir server and your new remote icon will appear in the remote profile list.

If any of your commands are not detected by your target application, locate the command under the Commands folder, right click and select Edit. This will open the Keyboard command dialog and you can check your command parameters. The most obvious suggestion is to make sure the "Send keyboard command to application" checkbox is ticked and that you have entered the correct process (exe) path.

Once you have completed your remote you might also like to add a help dialog to your remote. If you downloaded one of the templates a help dialog is already included and includes partial help instructions. To edit the help dialog in the remote profile templates start by editing your remote (right click > Edit) then click once on the 'TextViewDialogHelp' dialog icon in the Dialog container at the bottom of the remote design. Next click the 'View/Edit text' button for the 'Dialog text' parameter in the Properties panel. You can then edit the help dialog text accordingly. To add a help dialog to your own custom design, drag a 'TextViewDialog' control from the Toolbox into the Dialogs container of your design. Then edit the dialog title and text properties. To map a button to your dialog, save your design, expand the Dialogs folder, expand your dialog, right click on the 'Launch dialog command' and select 'Add touch screen event'. Then on the 'Add Touchscreen Event' dialog choose the button that you would like to open your help dialog.

Step 5: Share your Remote Profile

If you have built a remote profile for an application that Vectir does not support yet please condider sharing it. All you have to do is export your remote as a .vrp file (right click on your remote and select Export). Then zip your remote profile and send the .zip (or .rar) file to support@vectir.com. Include 'Share remote profile' in the email title. Your remote may then get included in the Vectir remote store. Make sure you have entered the remote metadata before exporting it. Click the Metadata button in the remote profile designer and enter the relevant information. We look forward to hearing from you!

Go to top